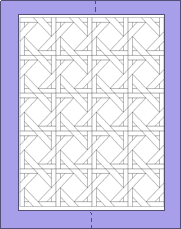
Checklist:
|
 |
Backing
and Batting 6-8" larger than top |
|
Backing
top/bottom square |
|
Backing
& top pressed |
|
Loose
threads trimmed |
|
| Backing: |
|
Size |
|
 |
|
Seams
(backing only) |
- If you have
a seam for your backing due to piecing two (or more) fabrics,
decide if you want the seam lengthwise or crosswise and indicate on the intake form or pin (safety pins only please!) a note to what you consider the top edge. If you don't
tell me, I'll assume based on the sizes of the fabric or if the fabric has a directional pattern.
-
I will almost always center a vertical seam with the middle of the quilt, however if you have a horizontal seam and would like it centered, let me know on your form. Please understand in advance that this is not something I can do with precision. I can get it sort-of centered by measuring and marking, but once the backing is loaded onto the frame, I have no control where it will land in the final product - backings stretch at a different pace than tops and it will not be exact.
- Not absolutely required, but if your seam
is created by sewing two selvedge edges together, stitch with
a seam larger than needed to cover the puncture marks. Then trim
your seam down to 1/2". Don't leave the selvedge in. If you
don't trim, your backing will have puckers when quilted (or if
not when quilted, then after a few washings).
- Also not required,
but recommended that you press your backing seam open. This reduces
the bulk when quilting.
|
|
Other |
- Press your backing.
It should be as wrinkle-free as possible. Do not however fret if you've now folded your pressed back and it might get wrinkled in the bag. The magic of pressing first means that the back will retain a memory of being pressed and once it is loaded onto the quilting frame, it will press itself back into submision.
- Pieced backings: I'll be honest - pieced backings don't make me very happy - especially ones that are essentially a 2nd quilt -- this is because I can't see much of the
back while I'm quilting, so don't know until the quilt is done whether it remained straight or squared with the top. Pieced backings will incur an additional charge if I need to attempt
to center a design with the top -- especially if the design is
crosswise. As you are creating your pieced backing, work especially
hard to keep it squared as you go along and it must follow the same rules of being larger than the top (See my SIZE note above). I highly recommend re-thinking whether you really need a pieced backing. This does not apply to pieced backing where you are just economizing different fabrics - I'm mostly thinking of those where are intricate 2nd quilt tops. Do realize with either, same is true that I can't see to make sure seams are horizontal/vertical on the backing piece.
|
|
Batting |
- Batting should
be approximately the same size as your backing (6-8" larger
than the top).
- Type of batting
is customer preference although I prefer to not quilt with high-loft
polyester (craft type) batting.
- You can purchase
Hobbs 80/20 (96" or 120" wide) from me if desired (at
a cost typically cheaper than most stores, starting at $6.50 a
yard) or you may provide your own batting. Ask me if you need
help deciding what type of batting to use for your project.
|
| Top: |
|
Borders |
- Before attaching
borders, press and square your top (all four sides should be at
a 90 degree angle). See my tutorial on avoiding wavy borders. If your top isn't square, no matter how straight
your borders start out, they will end up "wavy". One thing I like to do is lay my quilt out on the floor after I'm done - if it doesn't lay pretty flat, it is going to have issues being quilted.
|
|
Pressing |
- As
with your backing, your top should be pressed and as wrinkle-free
as possible. If I have to press your quilt, I charge my hourly rate and $10.00 minimum.
- Seams should
be flat and be butted or pressed open. HINT: If you weren't able to butt all your
seams while piecing, when you press, snip near the junction of
the seams to be able to press one of the seams the other direction.
Bottom line: there should be no lumps on the top of your quilt.
Lumpy seams will make the quilt look lumpy or worse - break needles
which could tear the fabric.
To be honest though - I'm not the quilt police and 99% of the time it doesn't matter what it looks like "under the hood". Basically just look at the top and if it seems to be behaving and look flat and wrinkle free, it's fine and if I have to quickly iron a small section, you won't be charged anything.
|
 |
| |
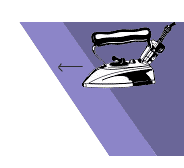
- Press border
seams the width of the border with your iron rather than length.
Pressing the length can stretch your borders out (make them "wavy"
or "wonky"). See graphic to right and see my special
page on other ways to prevent wavy
borders.
|
 |
|
Loose
Threads |
- Trim
off all loose threads from the top of your quilt (no I don't care about underneath, although you might if you have dark threads showing thru light fabrics).
|


